How to Bend The Knee in 3dsMax Using Control Rigs on Biped
Published on Tue - 8th Aug 2017
9204 views
Understanding Bipeds
According to Autodesk , Biped is a 3ds Max component that you access from the Create panel. Once you create a biped, you animate it using the Biped controls on the Motion panel. Biped provides tools to let you design and animate the figures and motion of characters.
The biped skeleton created with the Biped module is a two-legged figure created as a linked hierarchy, and designed for animation. The biped skeleton has special properties that make it instantly ready to animate.
Now with basics aside , Lets go directly to Bending the Knee of our 3d Model Character.
Add a control rig to the characterized 3ds Max Biped
You can add a Control rig to the 3ds Max biped you characterized easily do using controls .... controls are only the object which can be any shape.
In this example we've used circles for hips and arms ... and rectangles for box

Now Lets begin ...
Step 1
Set key under Key info( red dot butto, press it) While Biped is Selected (Foot part / Hand Part) , be sure your not in figure mode while doing this.
Step 2
Set IK blend to 1.0
Step 3
The intended controller (shape you created) is not part of the body remove the checker from body to Object.
Step 4
Click the "arrow which points up-right" and select the shape to link it to your foot/arm
Step5
if done correctly , your controls should be working... now the good part is having control of PELVIS (CENTRE OF MASS)
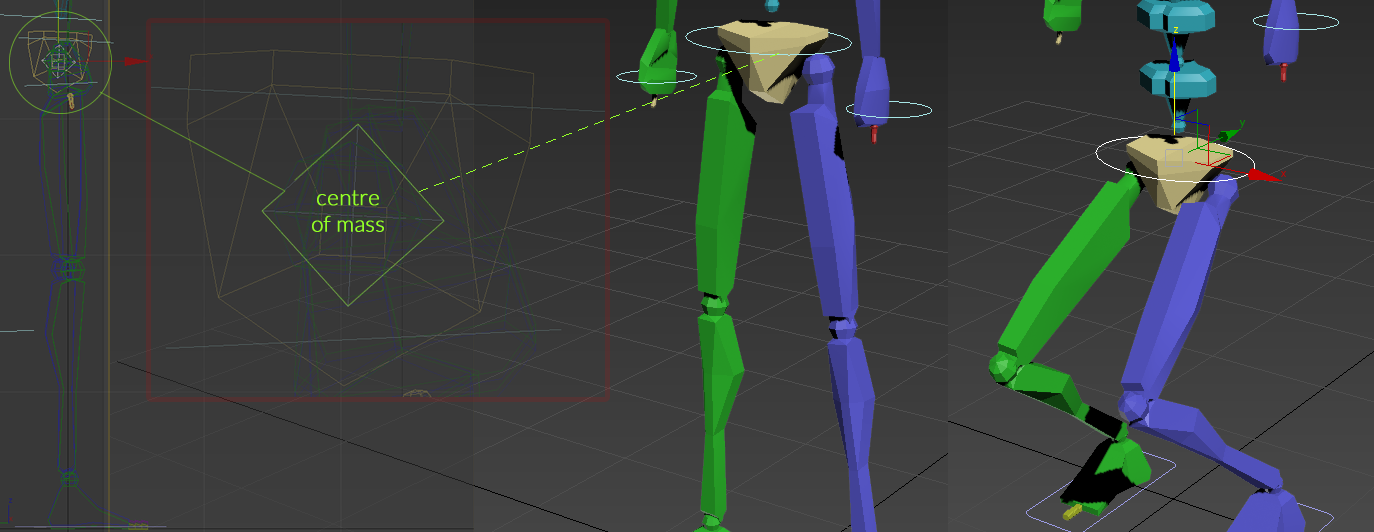
Step 6
If you look at your wireframe window, you will notice there is a red/yellow box at the middle of your pelvis (biped) , That is the centre of mass of this entire biped... to control that you have to normally link it to your controller (circle shape around pelvis you created) ... DONE!
Enjoy animating!
Sponsored Ad